| Advanced Services | Ein- und Ausgabe von Text |
|
protected Fl_Widget::Fl_Widget(int x, int y, int w, int h, const char* label=0);und ist, wie man sieht, geschützt. Man kann also kein Objekt dieser Klasse erstellen. Man kann aber eine Klasse von Fl_Widget ableiten und sie mit einem public Konstruktor der gleichen Signatur ausstatten. Alle Unterklassen aus der API tun dies.
Fl_Box, Fl_Browser_, Fl_Button, Fl_Chart, Fl_Clock_Output, Fl_Free, Fl_Group,
Fl_Input_, Fl_Menu_, Fl_Positioner, Fl_Progress, Fl_Timer, Fl_Valuator
Fl_Browser_, Fl_Color_Chooser, Fl_Help_View, Fl_Input_Choice, Fl_Pack, Fl_Scroll,
Fl_Tabs, Fl_Spinner, Fl_Tabs, Fl_Text_Display, Fl_Tile, Fl_Window, Fl_Wizard
| Objektorientierter Standard | FLTK |
|---|---|
| char* Fl_Output::getText() | char* Fl_Output::value() |
| void Fl_Output::setText(const char*) | int Fl_Output::value(const char*) |
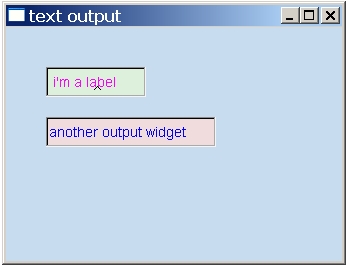
Das folgende Codefragment erzeugt zwei Objekte zum Ausgeben von Text:
#include <FL.H>
#include <Fl_Window.H>
#include <Fl_Output.H>

int main()
{
   Fl_Window win(250,200,400,300,"text output");
   win.size_range(200,100); // durch angabe einer minimalen größe wird die fenstergröße veränderbar
   // minimale größe breite 200, höhe 100
   Fl_Color col = fl_rgb_color(200, 220, 240);
   win.color(col);

   Fl_Output output1(40,40,100,30);
   //output1.deactivate();
   output1.value(" i'm a label");
   output1.textcolor( fl_rgb_color(255, 0, 255) );
   output1.color( fl_rgb_color(220, 240, 220) );  // hintergrundfarbe

   Fl_Output output2(40,90,170,30);
   output2.value("another output widget");
   printf( "%s", output2.value() );
   output2.textcolor( fl_rgb_color(0, 0, 255) );
   output2.color( fl_rgb_color(240, 220, 220) );  // hintergrundfarbe

   win.show();
   return Fl::run();
}
Und so sieht das aus:

Das kleine Caret im ersten Widget zeigt an, daß dieses Widget den Fokus hat.
Text eingeben mit Fl_Input
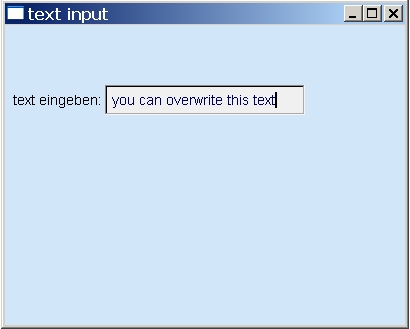
Das folgende Codefragment erzeugt ein Objekt zum Eingeben von Text:
#include <FL.H>
#include <Fl_Window.H>
#include <Fl_Input.H>

int main()
{
   Fl_Window win(250,200,400,300,"text input");
   win.size_range(200,100); // durch angabe einer minimalen größe wird die fenstergröße veränderbar
   // minimale größe breite 200, höhe 100
   Fl_Color col = fl_rgb_color(210, 230, 250);
   win.color(col);

   Fl_Input input1(100,60,200,30, "text eingeben:");
   input1.value("you can overwrite this text");
   input1.textcolor( fl_rgb_color(0, 0, 100) );
   input1.color( fl_rgb_color(240, 240, 240) );  // hintergrundfarbe

   win.show();
   return Fl::run();
}
Und so sieht das aus:

|
|